Table of Contents
Introduction
Understanding how to wire a 3-way switch can be a valuable skill for any homeowner or electrician. A 3-way switch allows you to control a single light fixture from two different locations, making it perfect for staircases, hallways, or large rooms with multiple entry points. In this tutorial, we’ll guide you through the process of wiring a 3-way switch with a comprehensive step-by-step approach.
What is a 3 Way Switch?
Understanding the Basics
3 Way Switch Wiring Diagram A Step-by-Step Tutorial A 3-way switch differs from a standard single-pole switch, which controls a light fixture from one location. With a 3-way switch, you have two switches that work together to control one fixture, allowing for greater convenience and flexibility in lighting control.
Components of a 3 Way Switch System
- Two 3-Way Switches: These switches have three terminal screws and can control the light fixture from two separate locations.
- Light Fixture: The light or electrical load that will be controlled.
- Electrical Boxes: Enclosures that house the switches and provide safety and mounting.
- Wiring: Typically, 12/2 or 14/3 cables are used, consisting of a hot wire, neutral wire, and traveler wires.
Tools and Materials Needed
Essential Tools
- Screwdrivers (Flathead and Phillips)
- Wire Strippers
- Voltage Tester
- Pliers
- Electrical Tape
Materials Required
- Two 3-Way Switches
- Electrical Wire (12/2 or 14/3)
- Wire Nuts
- Electrical Boxes
- Light Fixture
Safety Precautions Before You Start
Importance of Safety
Before beginning any electrical project, it is crucial to prioritise safety. Working with electrical wiring can be hazardous if not done correctly.
Key Safety Measures
- Turn off power at the circuit breaker.
- Use a voltage tester to confirm that the power is off.
- Wear rubber-soled shoes and gloves to minimise the risk of electric shock.
- Follow local building codes and regulations.
Step-by-Step Guide to Wiring a 3 Way Switch
Step 1: Plan Your Wiring Layout
Before starting the wiring process, plan the layout. Determine where the switches and light fixture will be installed and measure the distance to calculate the length of wire needed.
Step 2: Install the Electrical Boxes
Install the electrical boxes for the two switches and the light fixture. Make sure the boxes are securely fastened to the wall or ceiling.
Step 3: Run the Electrical Cable
Run the electrical cable from the power source to the first switch box, then to the second switch box, and finally to the light fixture. Ensure that you leave enough excess cable at each box for making connections.
Step 4: Connect the Wires to the First Switch
- Black (Hot) Wire: Connect the black wire from the power source to the common terminal on the first switch.
- Red and White (Traveller) Wires: Connect the red and white wires to the traveller terminals on the first switch.
Step 5: Connect the Wires to the Second Switch
- Black Wire from the Fixture: Connect the black wire going to the light fixture to the common terminal on the second switch.
- Red and White (Traveller) Wires: Connect the red and white wires coming from the first switch to the traveller terminals on the second switch.
Step 6: Wiring the Light Fixture
- Black Wire to Black Wire: Connect the black wire from the second switch to the black wire of the light fixture.
- White (Neutral) Wire: Connect the white neutral wire from the power source directly to the white wire of the light fixture.
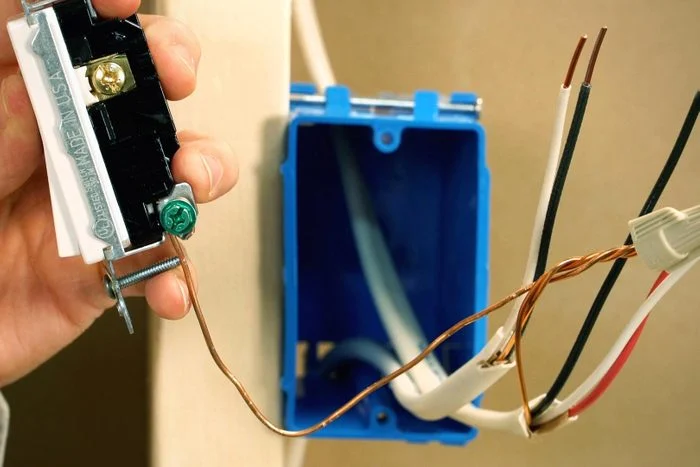
- Ground Wires: Connect the ground wires from the switches, fixture, and electrical boxes together and secure them with a wire nut.
Step 7: Secure All Connections
After making all connections, use electrical tape to secure the wire nuts and ensure all wires are tightly connected. Push the wires back into the boxes carefully and secure the switches and fixture in place.
Step 8: Test the Circuit
Before finishing, turn the power back on at the circuit breaker and test the switches to ensure the light fixture is controlled correctly from both locations. If the circuit doesn’t work as expected, double-check all connections.
Common Mistakes to Avoid
Improper Wiring Connections
One of the most common mistakes is incorrect wiring connections, which can result in a malfunctioning switch or, worse, an electrical hazard.
Not Using the Correct Type of Wire
Ensure you are using the correct type and gauge of wire (12/2 or 14/3) for the electrical load and circuit 3 Way Switch Wiring Diagram.
Skipping the Voltage Test
Never skip testing the circuit with a voltage tester before starting to work on it. This ensures that the power is completely off and minimises the risk of electric shock.
Tips for a Successful Installation
Label Your Wires
Label the wires to remember which wire is which, especially if the wiring process takes a long time or if you are interrupted during the installation.
Use Proper Tools and Equipment
Using the right tools will make the job easier and ensure that all connections are secure and safe.
Conclusion
Wiring a 3-way switch is a practical and valuable skill for managing lighting in various locations within your home. By following this step-by-step tutorial and observing safety precautions, you can successfully wire a 3-way switch and enjoy convenient lighting control. Always remember to consult a professional electrician if you are unsure about any step in the process.
For More Information Please Visit These Websites Viprow And Xewe

