How to Use Google Photos Magic Editor in 2026
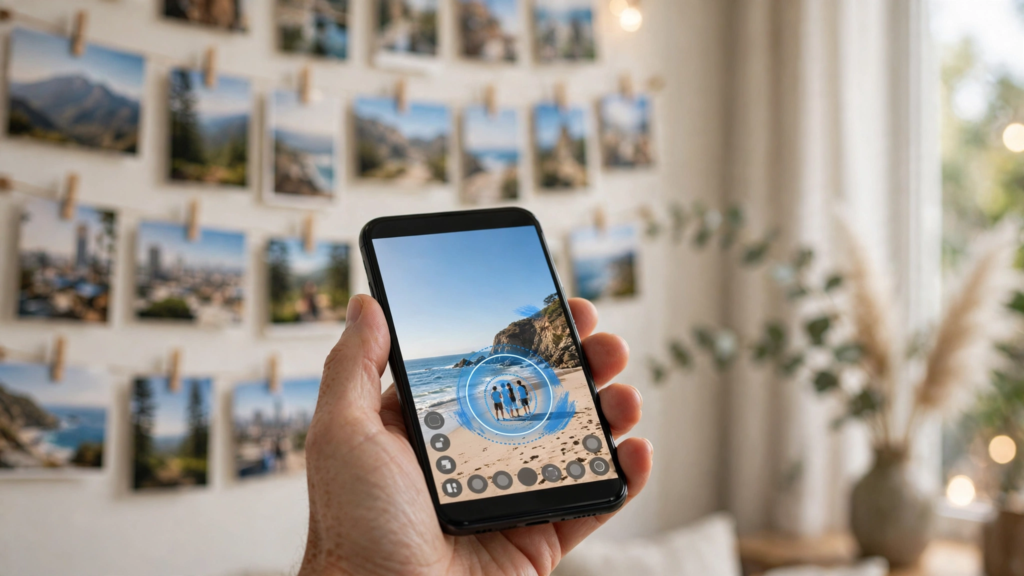
Learning how to use Google Photos Magic Editor in 2026 can change the way you edit pictures on your phone. Instead of spending a long time learning a complicated editing app, you can open a photo in Google Photos, tap Magic Editor, and use simple gestures to remove a stranger from the background, move a person to a better position, brighten a dull sky, or clean up a distracting object. The tool uses artificial intelligence to fill in the gaps, rebuild the background, and make the edit look natural, and for many everyday photos it produces a result that would once have needed a desktop editor and a lot of patience. This guide explains how to use Google Photos Magic Editor in 2026, step by step, what each feature does, when it works well, when it does not, and how to get results that still look like your real photo.
Magic Editor is part of Google Photos, the photo app that comes with most Android phones and is also available on iPhone. It sits alongside the ordinary editing tools, such as crop, brightness, and filters, but it goes further by letting you change the content of a photo, not just its colours. You can tap an object to select it, drag it to a new place, make it bigger or smaller, or erase it completely. You can also ask the editor to change the sky, improve the lighting, or tidy up the background. The results are not perfect every time, and some edits need a second try, but for holiday photos, family pictures, and social media posts, Magic Editor is often the fastest way to fix a photo that is almost perfect except for one small problem.
Before you start editing, it helps to understand what Magic Editor can and cannot do, because that will save you time and disappointment. It works best on clear photos where the subject is easy to see and the background is not too busy. It is good at removing a small object, a person in the background, or a piece of litter, and it is good at moving a subject a short distance. It is less reliable when the photo is very dark, very blurry, or crowded, and it can struggle with hands, faces, text, and fine details, where a small mistake is easy to spot. The guide below shows you how to use Google Photos Magic Editor in 2026 for each of its main features, with practical tips for checking your results and keeping a copy of the original photo, so you can always go back if an edit does not work.
What Is Magic Editor — How to Use Google Photos Magic Editor in 2026
Magic Editor is an AI editing feature inside Google Photos that lets you select, move, resize, and erase parts of a photo, and change elements such as the sky or the background. It was first introduced on Google Pixel phones and has since become available more widely, depending on your phone, your Google Photos version, and your Google account. Availability can change over time, so if you cannot find it on your phone, check that Google Photos is updated to the latest version in the Play Store or App Store, and check the current requirements on Google Photos support, which is the official source for which devices and accounts can use it.
The difference between Magic Editor and ordinary photo editing is important. Ordinary editing changes the whole photo: you adjust brightness, contrast, or colour, you crop the edges, or you apply a filter. Magic Editor changes a part of the photo. You can select a single person, a building, a tree, or an object, and change only that part, while the rest of the photo stays the same. That is why it feels so powerful for fixing a photo that is otherwise good. A stranger walking through the background, a bin in the corner, a closed eye, or a dull grey sky can all be fixed without affecting the rest of the picture, and without needing to learn layers, masks, or selection tools.
Magic Editor also includes features that used to be separate, such as Magic Eraser, which removes unwanted objects, and tools that improve the sky or the lighting. In the current version, these are often grouped together under the Magic Editor button, so you will find them in one place rather than in separate menus. The exact layout can vary by phone and by app version, so do not worry if your screen looks slightly different from the screenshots in a guide. The core actions are the same: open the photo, tap Edit, tap Magic Editor, tap or draw around the thing you want to change, and choose what to do with it. If your photos are not saving or backing up before you edit them, our guide on how to fix Google Photos not backing up on Android can help you sort that out first, because an edit is only useful if the original photo is safely stored.
Check Your Phone and Photo Before You Start
The first step in learning how to use Google Photos Magic Editor in 2026 is to check that your phone and your photo are ready. Open Google Photos, find the photo you want to edit, and tap it to open it full screen. Then tap the Edit button, which usually looks like a small slider or pencil icon at the bottom of the screen. If Magic Editor is available for that photo, you will see a button or an icon labelled Magic Editor, often with a small sparkle or wand symbol. Tap it, and the editor will open with your photo and a set of tools at the bottom. If you do not see the button, try updating Google Photos, restarting the app, and checking that you are signed in to your Google account, because the feature may need an update or a sign-in to appear.
It is also worth checking the photo itself before you edit it. Magic Editor works best when the photo is reasonably sharp, well lit, and not too heavily compressed. A photo that was sent through a messaging app, or a screenshot of a photo, may have lost quality, and the AI will have less detail to work with, so the edit may look less natural. Use the original photo from your camera or from Google Photos where possible, and avoid editing a copy that has already been edited, filtered, or compressed several times. If you are editing a photo you want to print or share in high quality, start with the highest quality version you have, and check the result at full size before you share it.
Before you make any change, think about what you want the final photo to look like, and make a plan. Is there one object to remove? Is the subject in the wrong place? Is the sky dull? Is the background too busy? Trying to fix everything at once can make the photo look artificial, so pick the one or two changes that will make the biggest difference, and leave the rest alone. It also helps to keep a copy of the original photo, so you can compare the edited version with the original and go back if you change your mind. Google Photos usually lets you revert an edit, but keeping a separate copy is the safest way to protect a photo that matters to you.
How to Use Google Photos Magic Editor in 2026 to Erase Objects
Erasing an unwanted object is the most popular use of Magic Editor, and it is the easiest place to start. Open the photo in Google Photos, tap Edit, then tap Magic Editor. Tap the object you want to remove, or draw a circle around it with your finger, and the editor will highlight the selection. You can adjust the selection by tapping again or by dragging the edges, and when you are happy with the selection, tap Erase or the delete option. The AI will then fill in the area where the object was, using the surrounding background, and show you a preview. If the result looks natural, tap Done or Save. If it looks wrong, tap Undo and try again, perhaps with a slightly larger or smaller selection.
This works well for small objects, such as a litter bin, a sign, a bag, or a person in the background. It works less well for large objects that cover a lot of the photo, because the AI has to invent a large area of background, and the result can look blurred or repeated. It also works less well when the object is in front of a complicated pattern, such as a fence, a tiled floor, or a crowd, because the pattern is hard to rebuild. In those cases, try selecting a smaller part of the object, or try erasing it in stages, and check the result closely by zooming in. If the edit leaves a faint smudge or a repeated texture, it is often better to crop the photo slightly to remove the area, rather than trying to erase it again and again.
A practical tip is to erase one object at a time and save the result before moving on to the next one, rather than trying to erase five things in one go. That way, if one erase goes wrong, you do not lose the good edits you have already made. Another tip is to check the edited area at full size by pinching to zoom in, because a problem that is invisible at small size can be obvious when the photo is viewed on a larger screen or printed. If you are preparing photos to share with family, our guide on how to share Google Photos albums with family explains how to share the edited versions safely, so everyone sees the best version of the photo.
Step-by-step: remove a person from the background
Open the photo, tap Edit, then tap Magic Editor. Tap the person in the background, or draw around them, and wait for the selection to appear. Adjust the selection so it covers the whole person but as little of the background as possible. Tap Erase, wait for the preview, and zoom in to check the background looks natural. If it does, tap Done and save. If the background looks smudged, tap Undo, try a slightly different selection, or crop the photo instead. This is the simplest example of how to use Google Photos Magic Editor in 2026, and it is the one most people try first.
How to Move, Resize and Reframe a Subject
Magic Editor can also move a subject within a photo, which is useful when the composition is not quite right. Perhaps the main person is too close to the edge, or a child is partly hidden behind another person, or the photo would look better if the subject were in the centre. To move a subject, open Magic Editor, tap the person or object you want to move, and drag it to its new position. You can also pinch to make it bigger or smaller, or rotate it slightly if the editor offers that option. When you move a subject, the AI fills in the space where it was, and it adjusts the lighting and shadows in the new position, so the result can look surprisingly natural if the move is small.
Small moves work best. Moving a person a short distance to the left or right, or making them slightly larger so they fill the frame better, usually looks good. Moving a person a long way across the photo, or making them much bigger or smaller, is harder, because the lighting, the perspective, and the background will not match as well. Faces and hands are also sensitive: a small change in size or position can make a face look slightly wrong, so check faces closely after any move, and undo the edit if the face looks unnatural. It is often better to crop the photo or to accept the original composition than to force a large move that looks artificial.
Reframing is a related skill that is worth learning alongside moving a subject. Sometimes the best fix is not to move the subject, but to change the shape of the photo. Magic Editor and the ordinary crop tool can work together: you can move a subject slightly, then crop the edges to improve the balance, and then adjust the brightness or colour. Try the move first, then the crop, and check the result after each step, rather than doing everything at once. If you are editing on a phone with a small screen, it can help to edit on a larger screen where possible, or to zoom in and out frequently, so you can see both the detail and the whole picture.
How to Change the Sky and Improve Lighting
One of the most impressive features of Magic Editor is its ability to change the sky or improve the lighting in a photo. A holiday photo taken on a grey day can look much better with a brighter sky, and a photo taken in harsh sunlight can look softer with a more balanced exposure. To use this feature, open Magic Editor and look for a sky, lighting, or style option, which may appear as a set of suggestions or as a separate tool, depending on your app version. Tap the option, and the editor will show you a preview of the change. You can usually choose between a few different skies or lighting styles, and you can adjust the strength of the effect if the editor offers a slider.
Use this feature with restraint. A sky that is too blue, too dramatic, or too different from the rest of the photo will look fake, and people will notice it immediately. Choose a sky that matches the light in the rest of the photo: if the shadows are soft and the light is even, choose a soft, bright sky, not a dramatic sunset. If the photo was taken in the evening, a bright midday sky will look wrong. The same applies to lighting: a small improvement in brightness and contrast can make a photo look clearer, but a large change can make skin look unnatural and colours look oversaturated. The goal is to make the photo look like a better version of the real moment, not like a different place or a different day.
It is also worth remembering that changing the sky or the lighting is a creative choice, and it is fine to use it for social media or for fun, as long as you are honest about it when it matters. For a family photo or a holiday snap, a brighter sky is harmless. For a photo that is meant to be a record of an event, a news photo, or a photo used as evidence, changing the sky or moving a person could be misleading, and you should avoid it. Keep the original photo, and if you share an edited version, be ready to say what you changed if someone asks. That honesty is part of using AI editing responsibly, and it protects you as well as the people in the photo.
Use Magic Editor with Portraits, Groups and Pets
Portraits need extra care when you learn how to use Google Photos Magic Editor in 2026, because faces are the part of a photo that people look at first, and a small error is easy to spot. When you edit a portrait, avoid moving or resizing a face, and avoid erasing anything that touches a face, a hand, or hair, because the AI can struggle to rebuild those details. If there is a distraction in the background of a portrait, erase it carefully, and check the result by zooming in on the face and the area around it. If the background looks smudged or repeated, undo the edit and try a smaller selection, or crop the photo instead.
Group photos are also tricky, because there are more people, more faces, and more chances for an edit to go wrong. If one person in a group photo blinked, or if a stranger is standing behind the group, Magic Editor can sometimes help, but it is not a magic fix for every group photo problem. It cannot reliably open a closed eye, fix a strange expression, or rebuild a face that is partly hidden, and trying to do so can make the photo look worse. The best use of Magic Editor for a group photo is to remove a small background distraction, to improve the lighting slightly, or to crop the photo to a better composition. For bigger problems, it is often better to choose a different photo from the same moment, if you took several, rather than trying to fix the one that went wrong.
Photos of pets can work well with Magic Editor, because pets are often photographed outdoors with a simple background, and a small distraction can be removed easily. However, fur is a fine detail that AI can struggle to rebuild, so avoid erasing anything that touches the animal’s fur, ears, or tail, and check the result closely. If you are editing a photo of a pet for social media, a small change to the background or the lighting is usually enough, and the pet itself should be left alone. The same principle applies to photos of children: keep edits simple, keep the child looking natural, and do not change the child’s appearance in a way that could be misleading.
When you edit portraits on a phone, the screen is small, so it is easy to miss a detail. After you finish an edit, view the photo at full size, and if possible, view it on a larger screen, such as a tablet or a computer, before you share it. Ask yourself whether the photo still looks like the real person, whether the lighting matches, and whether anything looks blurred, repeated, or out of place. If you are unsure, show the edited photo to someone else and ask what they think, because a fresh pair of eyes will often spot a problem you missed. For more help with taking and editing photos on Android, see our guide to the best budget Android phones in the UK in 2026, which covers camera features as well as editing tools.
Combine Magic Editor with Ordinary Editing Tools
Magic Editor works best when you use it together with the ordinary editing tools in Google Photos, rather than on its own. A good workflow is to start with Magic Editor for the big changes, such as removing an object or moving a subject, and then use the ordinary tools to finish the photo. Crop the photo to improve the composition, adjust the brightness and contrast slightly, and check the colour and saturation. A small increase in brightness can make a photo look clearer, and a small decrease in saturation can make colours look more natural, but large changes can make the photo look artificial, so use a light touch.
The order matters. If you crop first and then use Magic Editor, the editor will have less of the photo to work with, and it may not be able to fill in the background as well. If you adjust the brightness first and then use Magic Editor, the lighting in the edited area may not match the rest of the photo. The best order is usually: Magic Editor first for content changes, then crop for composition, then brightness, contrast, and colour for the final polish. After each step, check the result, and if a step makes the photo worse, undo it and try a different approach. You do not need to use every tool on every photo; sometimes a single erase is enough, and sometimes a crop and a small brightness change are all a photo needs.
Filters can also be used with Magic Editor, but they should be used carefully. A filter changes the whole photo, including the area you just edited, and it can make an edit more obvious if the filter changes the colours in a way that does not match the edited area. If you want to use a filter, apply it last, after all the Magic Editor changes, and choose a filter that is subtle rather than dramatic. Check the photo at full size after applying a filter, and if the edited area stands out, reduce the strength of the filter or remove it altogether. For help with Google Photos in general, Google Photos support offers step-by-step guides to the editing tools, including the current layout and options.
Save, Share and Keep Your Originals Safe
When you have finished editing a photo with Magic Editor, you need to save it correctly, or you could lose the edit or overwrite the original. In Google Photos, when you tap Save or Done after an edit, the app usually saves the edited version and keeps the original available so you can revert the edit later. That is convenient, but it is not the same as keeping a separate copy. If you want to be certain you can go back to the original, make a copy of the photo before you edit it, or save the edited version as a new copy, depending on the options your app version offers. Check the current save options in the app, because they can change with updates, and do not assume that an edit can always be undone.
Sharing an edited photo is straightforward, but it is worth checking the quality before you share it. A photo that looks good on your phone screen may look less good on a larger screen, or when it is printed, so view it at full size first, and check that the edited area looks natural. When you share through Google Photos, you can share a link, send the photo directly, or add it to a shared album, and our guide on how to share Google Photos albums with family explains the safest way to do that. If you share through a messaging app, be aware that some apps compress photos, which can reduce the quality and make an edit more obvious, so share the original file or use a method that keeps the quality high when the photo matters.
It is also important to make sure your photos are backed up before you spend time editing them. If a photo is only stored on your phone and the phone is lost or damaged, the photo and the edit are lost too. Google Photos can back up your photos to your Google account automatically, if backup is turned on, and you can check that it is working by looking for the backup status in the app. If backup is not working, our guide on how to fix Google Photos not backing up on Android explains the common causes, from Wi-Fi settings to storage limits, and how to fix them. Editing is only worth doing if the photo is safely stored first.
Common Problems and How to Fix Them
The most common problem when learning how to use Google Photos Magic Editor in 2026 is that the Magic Editor button does not appear. This can happen if Google Photos is out of date, if your phone does not support the feature, if you are not signed in, or if the feature has not yet been made available for your account. Update Google Photos from the Play Store or App Store, restart your phone, sign in to your Google account, and check Google Photos support for the current availability. If the feature is not available on your phone, you can still use the ordinary editing tools, and you can check whether a different phone or a newer version of the app supports it. Where a price or a phone specification matters, check the manufacturer’s own site, because availability and prices change.
Another common problem is that an edit looks unnatural, with a blurred patch, a repeated texture, or a strange edge. This usually means the selection was too large, the object was too big, or the background was too complicated. Try again with a smaller, more precise selection, try erasing in stages, or try a different approach, such as cropping the photo. If the same edit fails several times, the photo may simply not be suitable for that edit, and it is better to accept the original or choose a different photo. Not every photo can be fixed, and knowing when to stop is part of good editing.
Some people also find that Magic Editor is slow, or that it fails to save. This can happen if the photo is very large, if your phone is low on storage, if your internet connection is slow, or if the app needs an update. Free up storage on your phone, connect to a stable Wi-Fi network, close other apps, and try again. If the problem continues, restart your phone and check for an update to Google Photos. If you are editing on an older phone, a newer phone with a faster processor may handle AI editing more smoothly, and our guide to the best budget Android phones in the UK in 2026 can help you compare current options. Remember to check the manufacturer’s own site for the current price and specification before you buy anything.
Tips for Natural-Looking AI Edits
The best AI edits are the ones nobody notices, and that takes a light touch and a careful eye. Start with the smallest change that will fix the problem, and check the result before you make another change. If you remove an object, check that the background looks like the real background, not a blurred copy. If you move a subject, check that the shadows and lighting match. If you change the sky, check that the light on the subject matches the new sky. If anything looks wrong, undo the edit and try a different approach, rather than adding more edits on top of a bad one.
It also helps to edit with a purpose. Ask yourself what the photo is for, and who will see it. A photo for social media can be a little brighter and cleaner than the original, because it will be viewed on a small screen and people expect a polished image. A photo for a family album should look natural, because it will be viewed for years and people will remember the real moment. A photo for printing should be edited carefully at full size, because any mistake will be visible on paper. In all cases, the goal is to make the photo look like a better version of the real moment, not like a different photo altogether.
Finally, practise on photos that do not matter before you edit photos that do. Take a few test photos, try removing an object, moving a subject, and changing the sky, and see what works and what does not. That practice will teach you more than any guide, because you will learn how the tool behaves with your phone, your photos, and your style. Keep the originals, compare the edited versions with the originals, and ask a friend or family member what they think. Over time, you will develop a sense for which edits work and which do not, and you will be able to edit quickly and confidently.
Frequently Asked Questions
How do I use Google Photos Magic Editor?
Open a photo in Google Photos, tap Edit, then tap Magic Editor. Tap or draw around the object you want to change, choose Erase, Move, or another option, and tap Done to save. That is the basic answer to how to use Google Photos Magic Editor in 2026, and the same steps apply to removing objects, moving subjects, and changing the sky.
Is Magic Editor free to use?
Availability and any limits can change over time, and they can depend on your phone, your app version, and your Google account. Check the current details in Google Photos and on Google Photos, and check the app for any message about limits before you start a large editing session. Do not assume that a feature that was free last year is still free in the same way today.
Can Magic Editor remove people from photos?
Yes, it can remove a person from the background of a photo, especially if the person is small and the background is simple. It works less well for a large person in the foreground, or for a person in front of a complicated background. Select the person carefully, erase them, and zoom in to check that the background looks natural before you save.
Does Magic Editor work on iPhone?
Google Photos is available on iPhone, and Magic Editor availability can depend on the app version and your Google account. Open Google Photos on your iPhone, update it to the latest version, and look for the Magic Editor button when you edit a photo. If it does not appear, check Google Photos support for the current availability on iOS.
Can I undo a Magic Editor edit?
Google Photos usually lets you revert an edit, but the exact option depends on your app version and whether the edited photo has been saved and backed up. To be safe, keep a separate copy of the original photo before you edit it, so you can always go back to the unedited version, even if the revert option is not available later.
Why does my edited photo look fake?
An edit can look fake if the selection was too large, the move was too far, the sky does not match the lighting, or the background was too complicated for the AI to rebuild. Try a smaller selection, a smaller move, a more natural sky, or a different approach such as cropping. Check the photo at full size, because a problem that is invisible on a small screen can be obvious on a larger one.
Can Magic Editor fix a blurry photo?
Magic Editor is not primarily a tool for fixing blur, and it cannot reliably rebuild detail that was never captured. Google Photos includes other tools that can sharpen a photo slightly or improve its clarity, depending on your phone and app version, so check the current editing tools in the app. If a photo is very blurry, it is often better to take a new photo than to try to fix the blurry one.
Is it okay to use Magic Editor on photos of other people?
Yes, for ordinary editing such as removing a background distraction or improving the lighting, as long as you do not change the person’s appearance in a misleading way. Do not move a person, change their face, or edit a photo in a way that could mislead others about what happened. Keep the original, and be honest about what you changed if someone asks.
Key Takeaways
- Learning how to use Google Photos Magic Editor in 2026 starts with opening a photo in Google Photos, tapping Edit, then tapping Magic Editor, and selecting the object you want to change.
- Erase works best for small objects on a simple background, moving a subject works best for small moves, and sky changes work best when the new sky matches the light in the rest of the photo.
- Use Magic Editor first for content changes, then crop and adjust brightness and colour for the final polish, and check the result at full size after each step.
- Keep a copy of the original photo, make sure your photos are backed up before you edit them, and check the quality before you share an edited version.
- Be careful with faces, hands, and group photos, because small AI mistakes are easy to spot, and use a light touch so the edit looks natural.
- If Magic Editor does not appear, update Google Photos, restart your phone, sign in to your Google account, and check Google Photos support for the current availability.
Conclusion
Magic Editor is a powerful tool, but it works best when you use it with care and with a clear idea of what you want to fix. Start with a simple erase, check the result closely, and build up to moving a subject or changing a sky once you are confident. Keep your originals safe, back up your photos, and remember that the best edit is the one that makes the photo look like a better version of the real moment, not like a different photo. Try it today on a photo that has one small problem, follow the steps in this guide on how to use Google Photos Magic Editor in 2026, and you will soon be fixing photos in seconds that would once have taken a long time in a desktop editor. That is the real benefit of this tool, and it is available to you now, in the Google Photos app you already use.