๐Ÿ”ด LIVE
No live matches right now โ€” check today's schedule for upcoming kick-offs.

Every Score. Every Fixture. Free.

๐ŸŒ™

How to Fix Google Play Store Payment Errors on Android in 2026

Learning how to fix Google Play Store payment errors can save you from a frustrating loop of declined cards, vague error messages, and purchases that never complete. You tap Buy, the Play Store says your payment was declined or could not be processed, and you are left wondering whether the problem is your card, your bank, your Google account, or the Play Store itself. In most cases, the cause is simple: an expired card, a wrong billing address, a country mismatch, or a temporary hold from your bank. This guide walks you through each cause in order, from the quickest checks to the deeper fixes, so you can get back to buying apps, games, and subscriptions without guessing.

This guide covers the most common Play Store payment errors on Android in 2026, including declined cards, insufficient funds messages, errors when adding a payment method, and problems with family payments and subscriptions. You will learn how to check your card and bank, update your payment method in Google Play, clear the Play Store cache safely, remove and re-add a payment method, fix country and region problems, and contact Google support when nothing else works. Follow the steps in order and test a small purchase after each fix, so you know exactly which step solved the problem.

Common Google Play Store Payment Errors Explained

Related:ย Best Google Apps for Android Productivity in 2026
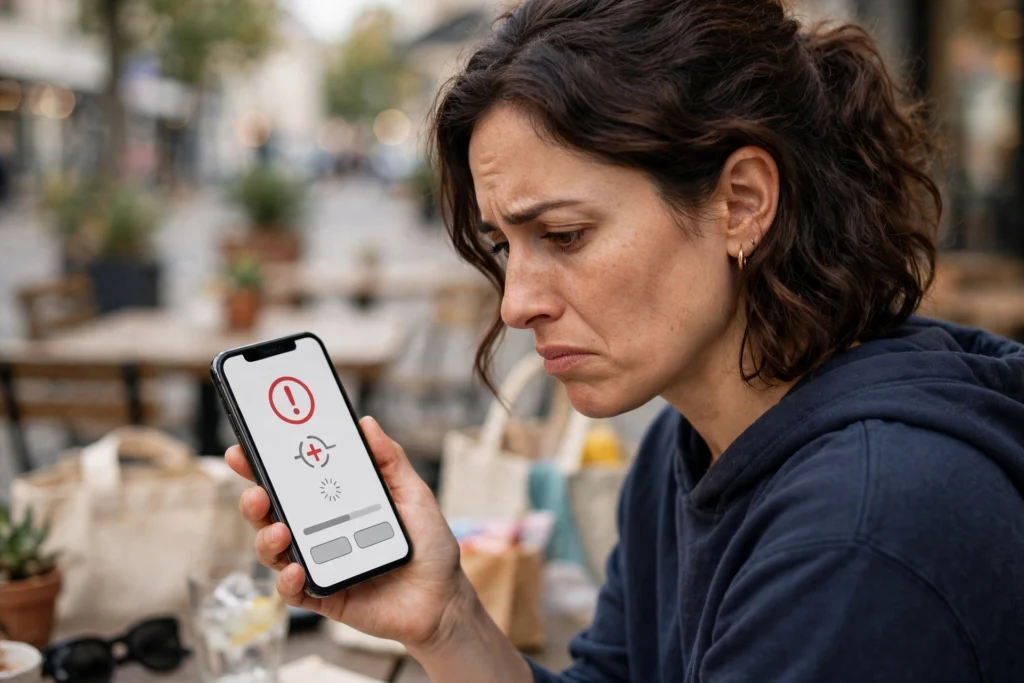
Person looking at a payment error on a phone screen while shopping online

Play Store payment errors appear in several forms, and the message you see is often the best clue to the cause. “Your payment was declined” usually means your bank refused the transaction, often because the card has expired, the billing address does not match, or the bank flagged the purchase as unusual. “Insufficient funds” means the account does not have enough money for the purchase, including any tax or pending hold. “Payment method declined” can also appear when a card is blocked for online or international payments, which is common with some debit cards.

Other messages point to your Google account rather than your card. “This payment method is not valid in your country” or a country error usually means your Google Play country does not match the country where your card was issued. “Unable to process your payment” can mean a temporary Play Store problem, a problem with Google’s payment system, or a card that needs verification. “OR-CCSEH-05” and similar codes are Google payment error codes that often relate to a card that needs to be verified or re-added. You do not need to memorise every code; the fixes below cover the causes behind most of them.

Before you change anything, check whether the problem is on Google’s side. Visit the Google Play status page or search for Play Store outages, and try a different Wi-Fi or mobile data connection. If the Play Store itself is down or your connection is unstable, no card change will help. If other people are reporting the same error at the same time, wait an hour and try again. If the problem is only on your device and your account, work through the steps below.

How to Fix Google Play Store Payment Errors: Check Your Card and Bank First

Bank card and smartphone on a desk beside a laptop

Start with the simplest cause: the card itself. Open Google Play, tap your profile icon, tap Payments and subscriptions, and tap Payment methods. Check that the card you want to use is listed, that its expiry date is in the future, and that the last four digits match the card in your hand. If the card expired recently, your bank may have sent a replacement with a new expiry date and security code, and the old details in Google Play will keep failing until you update them.

Next, check the billing address. Tap the card in Payment methods, tap Edit, and compare the name, address, and postcode with the address your bank holds for you. A single wrong digit in a postcode or a house number can cause a decline, because banks check the billing address as part of the security check. If you moved house recently, update the address with your bank first, then update it in Google Play to match. The same applies to the name on the card: use the name exactly as it appears on the card.

Then check with your bank. Log in to your banking app and look for a declined transaction, a fraud alert, or a message asking you to confirm the purchase. Some banks block Play Store purchases by default for online or international payments, or they place a temporary hold after an unusual purchase. Call the number on the back of your card or use your banking app to confirm the payment and ask the bank to allow Google Play transactions. If you are using a debit card, check that it is enabled for online purchases, because some debit cards are set to in-store use only until you change the setting.

How to Update Your Payment Method in Google Play

Hands updating payment settings on a smartphone

If your card details are wrong or out of date, updating them in Google Play is the next step. Open Google Play, tap your profile icon, tap Payments and subscriptions, tap Payment methods, and tap the card you want to fix. Tap Edit to change the expiry date, security code, billing address, or name, and save the changes. If the card is no longer valid, tap Remove, then tap Add payment method and enter the new card details from scratch. Adding the card again forces Google to verify it, which often clears an old error.

You can also manage payment methods at Google Play payment methods on a computer, where it is easier to type a long address and check each field. Sign in with the same Google account you use on your phone, click Payment methods, and edit or add the card there. The changes sync to your phone within a few minutes. After you update a card, try a small purchase or a free app with an in-app purchase to test it, rather than retrying a large purchase straight away.

If you have more than one payment method, try a different one. Tap the price on the app or subscription page, tap the payment method shown, and choose another card or PayPal if it is available in your country. If the second method works, the problem is with the first card, not with your Google account. Keep the working method as your default until you have fixed the other card with your bank. For help with wallet and payment setup in the UK, see our guide on how to use Google Wallet on Android in the UK.

How to Fix Google Play Store Payment Errors by Clearing the Cache

Person clearing app settings on an Android phone

A corrupted cache can stop the Play Store from processing payments correctly, even when your card is fine. Clearing the cache is safe and does not delete your apps, purchases, or account. Open Settings on your Android phone, tap Apps, tap See all apps, find Google Play Store, tap Storage and cache, and tap Clear cache. Then reopen the Play Store and try the purchase again. In many cases, this alone fixes a payment error that appeared after an app update or a failed purchase.

If clearing the cache does not help, clear storage as well, but understand what it does first. Clearing storage resets the Play Store app to its initial state, signs you out of the Play Store app, and removes its temporary data. It does not delete your installed apps or your Google account. After you clear storage, open the Play Store, sign in again if asked, and try the purchase. Do the same for Google Play services if the problem continues: open Settings, tap Apps, find Google Play services, tap Storage and cache, and tap Clear cache. Do not clear data for Google Play services unless Google support asks you to, because it can affect other apps.

After clearing the cache, restart your phone. A restart clears temporary system states that can interfere with payments, especially after a system update. Then open the Play Store, check that you are signed in to the correct Google account, and try the purchase once more. For a full walkthrough of clearing cache without losing data, see our guide on how to clear cache on an Android phone safely.

How to Fix Google Play Store Payment Errors by Removing and Re-Adding Your Payment Method

When a card keeps failing even though the details look right, removing it and adding it again often fixes the problem. Google may have stored an old verification state or an incomplete token for the card, and re-adding it creates a fresh one. To do this, open Google Play, go to Payments and subscriptions, tap Payment methods, select the card, and tap Remove. Confirm the removal, then tap Add payment method and enter the card details carefully, including the correct billing address and postcode.

Google may make a small temporary charge, often less than one pound or dollar, to verify the card. This charge is refunded automatically and should disappear from your bank statement within a few days. If the verification fails, check the security code and expiry date again, and make sure the card is not blocked for online use. If you are adding a card from a different country to the one set in your Google Play country, the add will fail, which is covered in the next section.

Do not remove and re-add the same card more than a few times in a short period, because repeated failed attempts can trigger a temporary block from your bank or from Google. If the card fails twice, stop, check the details with your bank, and try a different payment method or wait a few hours before trying again. If you use a virtual card or a card from a digital bank, check that the virtual card is active and that it has not been frozen or replaced since you added it to Google Play.

Fix Country and Region Mismatches

Country mismatches are one of the most common causes of Play Store payment errors, and they are also one of the most confusing. Google Play has a country setting that controls which apps, prices, and payment methods you can use. Your payment method must be issued in the same country as your Play country, and your billing address must match that country. If you moved to a new country, changed your address, or are using a card from another country, payments will fail until the countries match.

To check your Play country, open Google Play, tap your profile icon, tap Settings, tap General, and tap Account and device preferences. Your country is shown there. To change it, you need to be physically in the new country, have a payment method issued in that country, and update your Google Pay profile address to the new country. Google only lets you change your Play country once a year, so do not change it for a short trip. If you are travelling, wait until you return home before changing it, or use a payment method from your home country.

If you recently moved, update your Google Pay profile first. Go to Google Play country help, sign in, and check the country in your payments profile. Update the address to your new home, add a local payment method, and then change your Play country in the app. After the change, your old payment methods from the previous country may stop working, and some subscriptions may need to be cancelled and repurchased in the new country. This is normal, and it is better to fix it properly than to keep retrying a card that will never work in the wrong country.

Fix Family Payment and Subscription Errors

Family payment errors have their own causes. In a Google family group, only the family manager’s payment method can be used for family purchases, unless the family manager has set up a family payment method. If you are a family member and your own card is being declined for a shared purchase, check whether the purchase is set to use the family payment method. The family manager can check this in Google Play under Payments and subscriptions, then Family, and then Manage family payment method.

Subscription errors are often caused by a card that expired after the subscription started. Open Google Play, tap your profile icon, tap Payments and subscriptions, tap Subscriptions, and tap the subscription that failed. Check the payment method shown and update it to a working card. Google will usually retry the payment automatically within a few days, but you can also tap Update payment or Resubscribe to force a retry. If the subscription was cancelled because the payment kept failing, you may need to subscribe again after fixing the card.

For children in a family group, purchase approvals can also block a payment. If a child tries to buy an app and the parent does not approve it in time, the purchase fails. The parent should check their email or Google Family Link app for the approval request and approve it promptly. If approvals are not arriving, check that the parent’s email address is correct and that notifications for Family Link are turned on.

Error Codes and What They Mean

Google Play sometimes shows an error code instead of a clear message. The code OR-CCSEH-05 usually means the card needs verification or the payment profile has a problem. Try removing and re-adding the card, and check that the billing address matches your bank. Error OR-BIBED-01 and similar codes often mean the card was declined by the bank, so contact your bank first. Error BM-CPH-01 can mean a problem with your Google Pay profile, such as a missing address or a country mismatch, so check your payments profile on a computer.

Error 403 or a message that the purchase could not be completed can mean a temporary Play Store problem. Clear the cache, restart the phone, and try again on a different connection. If the same error appears for every purchase and every payment method, the problem is more likely with your Google account than with a single card. Check that your account is not restricted, that you have not exceeded a purchase limit, and that your Google Pay profile is complete with a name, address, and phone number.

Keep a note of the exact error code and message you see, because Google support will ask for it. Take a screenshot of the error screen, including the time and the app you were trying to buy. This helps support identify the cause faster than a general description. Do not keep retrying the same purchase many times in a row, because repeated declines can trigger a temporary block that makes the problem worse.

When to Contact Google Support

If you have checked your card, updated your payment method, cleared the cache, fixed the country, and the payment still fails, it is time to contact Google support. Open Google Play, tap your profile icon, tap Help and feedback, and tap Contact us. Choose the payment problem that matches your error, and follow the prompts to chat or request a callback. Have your order details, error code, and screenshot ready, and be ready to confirm the last four digits of the card and the billing address.

Google support can check whether your payments profile is flagged, whether a payment was blocked for security reasons, or whether a subscription needs to be reset. They cannot fix a bank decline, so if support tells you the bank refused the payment, go back to your bank with the exact time and amount of the failed transaction. If support finds a problem with your Google account, they can guide you through fixing it, which may include verifying your identity or updating your payments profile.

While you wait for a fix, you can use an alternative way to pay if it is available. Google Play gift cards work in many countries and can be redeemed in the Play Store to add credit to your account. PayPal is also accepted in many countries and can be added as a payment method in the same Payment methods menu. These are useful workarounds for a single purchase, but they do not fix the underlying card problem, so still work through the steps above.

Preventing Play Store Payment Errors in Future

Once your payment is working again, a few habits will stop the problem from returning. Keep your card details current in Google Play, and update them as soon as your bank sends a replacement card. Set a reminder to check the expiry date a month before it runs out. Keep your billing address in Google Play matched to your bank address, and update both when you move house. Keep only the payment methods you actually use, and remove old cards, expired cards, and cards from banks you no longer use.

Turn on purchase authentication in Google Play, so every purchase needs your fingerprint, face, or Google account password. This stops accidental purchases and makes it harder for someone else to use your payment method if they pick up your phone. Open Google Play, tap your profile icon, tap Settings, tap Authentication, and tap Require authentication for purchases. Choose For all purchases for the strongest setting. You can find official guidance on payment settings on the Google Play payment help pages.

Finally, keep the Play Store and Google Play services updated, and keep your Android system updated. Payment errors are sometimes caused by an outdated Play Store version that does not handle a new bank security check correctly. Turn on automatic updates for the Play Store in its settings, and check for system updates in Settings, then System, then System update. If you are running low on Gmail storage and cannot receive bank verification emails, our guide on how to free up Gmail storage space can help you clear space quickly.

Key Takeaways

  • How to fix Google Play Store payment errors starts with checking the card expiry date, billing address, and bank approval before changing anything else.
  • Update the payment method in Google Play or at play.google.com, and try a different card to tell whether the problem is the card or the account.
  • Clear the Play Store cache safely, restart your phone, and re-add the card if it keeps failing.
  • Make sure your Google Play country matches the country where your card was issued, and update your Google Pay profile when you move.
  • For family and subscription errors, check the family payment method and update the card on the subscription itself.
  • Note the exact error code, take a screenshot, and contact Google support if the bank says the card is fine but Play still declines it.
  • Keep card details current, remove old cards, and turn on purchase authentication to prevent future errors.

Frequently Asked Questions

Why is my card declined on Google Play when it works elsewhere?

The most common reasons are a billing address mismatch, a card blocked for online or international payments, or a bank fraud check that flagged the Play Store purchase. Check the billing address in Google Play against your bank address, confirm the card is enabled for online purchases, and ask your bank to allow Google Play transactions. The card may work in shops but still be blocked online.

How do I update my payment method on Google Play?

Open Google Play, tap your profile icon, tap Payments and subscriptions, tap Payment methods, and tap the card to edit it or remove it and add a new one. You can also manage payment methods at play.google.com on a computer. After updating, test with a small purchase to confirm the new details work.

What does error OR-CCSEH-05 mean?

It usually means the card needs verification or there is a problem with your Google payments profile. Remove the card, re-add it with the correct billing address, and check that your payments profile has a complete name and address. If it still fails, contact Google support with the error code and a screenshot.

Can I change my Google Play country to fix a payment error?

Only if you have genuinely moved to a new country. You need to be in the new country, have a payment method issued there, and update your Google Pay address. You can only change your Play country once a year, so do not change it for a holiday. If you are travelling, use a card from your home country instead.

Will clearing Play Store data delete my apps?

No. Clearing the Play Store cache or storage does not delete your installed apps, purchases, or Google account. It resets the Play Store app and signs you out of the app, so you may need to sign in again. Your apps and purchases remain tied to your Google account and can be reinstalled from your library.

How do I fix a subscription payment that keeps failing?

Open Google Play, go to Payments and subscriptions, tap Subscriptions, tap the failed subscription, and update its payment method to a working card. Google will retry the payment automatically, or you can tap to retry it. If the subscription was cancelled, subscribe again after fixing the card.

Can I use PayPal or a gift card instead?

Yes, in many countries. PayPal can be added as a payment method in Google Play, and Play gift cards can be redeemed to add credit to your account. These are useful workarounds for a single purchase, but they do not fix a broken card, so still update the card details with your bank if you want to keep using it.

How long does a bank verification charge take to disappear?

A small temporary verification charge, often less than one pound or dollar, usually disappears within a few days. It is a hold, not a real purchase, and your bank should remove it automatically. If it is still there after a week, contact your bank with the date and amount of the charge.

Conclusion

Knowing how to fix Google Play Store payment errors is mostly about working through the causes in order: card, address, bank, payment method, cache, country, and account. Most errors are fixed in the first three steps, and the rest are usually a country mismatch or a card that needs to be removed and re-added. Keep your card details current, turn on purchase authentication, and note the exact error code if you need to contact support. With the steps in this guide, you can fix the error yourself in most cases and get back to buying apps, games, and subscriptions without the frustration of repeated declines.

How to Set Up Google Family Link Parental Controls in 2026: Guide

Last updated: October 26, 2026

Learning how to set up Google Family Link parental controls in 2026 is one of the best steps you can take to give your child a safe, balanced start with technology. Family Link lets you create and supervise a Google account for your child, set screen-time limits, approve or block apps, filter web content, manage in-app purchases, and see where their device is โ€” all from your own phone. Done well, it protects children without spying on every message, and it gives families a clear set of rules everyone understands.

Many parents delay setup because it sounds technical, but the process is simpler than most people expect. If your child already has an Android phone or tablet, you can link it in under half an hour. If you are setting up a brand-new device for your child, Family Link is built into the setup flow, so you create the supervised account as part of first-time setup. Either way, the key is to prepare beforehand: know which Google account you will use as the parent, decide on sensible limits together, and talk to your child about why the controls exist.

This guide walks you through the full setup, step by step, for both new and existing devices. You will learn how to create a child account, link devices, set daily limits and bedtimes, approve apps, filter content on Google Play and Chrome, manage YouTube, control location sharing, and adjust settings as your child grows. You will also find troubleshooting tips, privacy guidance, and answers to the questions parents ask most often, so you can set up Family Link with confidence.

What Is Google Family Link and How Does It Work?

Google Family Link is Google’s free parental supervision tool for Android devices and Chromebooks, and for Google accounts used by children under the age of digital consent in your country. As a parent or guardian, you install the Family Link parent app on your own phone, create or link a Google account for your child, and then manage that account’s device from your phone. Your child signs into their device with their supervised account, and your rules โ€” screen time, app approvals, content filters, and purchase blocks โ€” apply automatically.

Family Link is not a spy tool. It does not let you read your child’s messages, emails, or browsing history in detail, and it does not record what they type. What it does give you is practical supervision: which apps are installed, how much time is spent on the device overall and per app, whether new apps need approval, what content filters apply, and, if you enable it, the device location. That balance matters, because children learn digital responsibility best when rules are transparent and conversations accompany controls.

Family Link works best when it is part of a wider family agreement. Agree on when devices can be used, where they charge overnight, what to do if something upsetting appears online, and how limits can be earned or adjusted with age and responsibility. Controls enforce the agreement, but conversation builds the trust that makes controls less necessary over time. Set Family Link up as a safety tool, not a punishment, and revisit the settings together every few months.

how to set up Google Family Link parental controls in 2026: Before You Start

Before you begin how to set up Google Family Link parental controls in 2026, gather three things. First, your own Google account, which will become the family manager account โ€” use the account you check regularly, because approval requests and alerts go there. Second, your child’s device, charged and connected to Wi-Fi, with the latest system updates installed. Third, a few minutes of uninterrupted time, plus your child nearby for the parts that need their sign-in or consent, depending on their age.

Install the Family Link app for parents from the Play Store on your phone, and make sure the child’s device has the Family Link child app or the built-in supervision support that comes with modern Android. On most Android phones and tablets, you do not need to install a separate child app โ€” supervision is handled through Settings and the setup flow. If the child’s device is very old or runs a heavily customised system, check compatibility first and update the software, because older versions may lack newer supervision features.

Decide your starting rules in advance, so setup is quick and consistent. A good starting point for younger children is a daily limit of one to two hours, a bedtime that locks the device overnight, app-approval turned on for new installs, purchase approval required, and SafeSearch and Play filters set to the strictest age-appropriate level. For teenagers, you may allow more time, more app freedom, and location sharing only with discussion. You can relax any setting later in seconds, so starting stricter and loosening with trust is easier than starting loose and tightening after a problem.

What You Need for a New Device Versus an Existing Device

For a brand-new Android device, you will create the child’s account during setup: turn the device on, choose language and Wi-Fi, and when asked who will use the device, select a child, then follow the prompts to sign in as the parent and create the child’s account. For an existing device your child already uses, you will either add supervision to their current account if they are eligible, or create a new supervised account and sign them into it, which may require a factory reset on some devices. Back up photos and important files before resetting an existing device, because a reset erases local data.

Talk to Your Child First

Explain in simple, positive language what Family Link will do and what it will not do. For example: “This helps us agree on screen time, stops surprise purchases, and blocks unsuitable apps. It does not read your messages.” Let older children help choose limits and suggest apps they want approved, so they feel ownership rather than restriction. Children who understand the reasons cooperate far more than children who discover locks without warning, and that cooperation is worth more than any single setting.

Step-by-Step: Create a Child Account and Link the Device

Open the Family Link parent app on your phone and tap Get Started or Create Account. Sign in with your parent Google account if asked. Enter your child’s name and date of birth accurately, because age determines which protections apply and when supervision can later be removed. Choose a username and password for your child’s new Google account, and save the password somewhere safe โ€” you will need it if the child signs into a new device or a Chromebook later.

Next, follow the prompts to link the child’s device. If you are setting up a new device, enter the setup code shown on the child’s device into your parent app, or sign in as the parent when the device asks. If you are linking an existing device, open Settings on the child’s device, go to Digital Wellbeing and parental controls or Google, then Parental controls, and follow the linking steps. The parent app will guide you through consent screens, explaining what supervision covers. Read these screens together if your child is old enough to understand them.

Once linked, your parent app will show the child’s device, account, and basic controls. Test the link immediately: from your phone, set a short screen-time limit or lock the device for five minutes, then check that the child’s device responds. Unlock it again from your phone to confirm control works both ways. Testing now, while you are calm and at home, is far better than discovering a linking problem when you urgently need to lock the device or approve an app for school.

Set Screen Time, Daily Limits, and Bedtime

Screen-time controls are the heart of Family Link. In the parent app, select your child, tap Controls or Screen time, then set a daily limit for each day of the week if you want weekends to differ from school days. You can also set app-specific limits, for example allowing unlimited time for a reading or homework app while limiting games and video apps. App limits are more useful than a single total, because they distinguish productive use from entertainment without banning the device outright.

Bedtime is equally important. Set a bedtime schedule that locks the device overnight, for example from 9 p.m. to 7 a.m. on school nights. During bedtime, the device shows a lock screen explaining that it is bedtime, and only emergency calls and any apps you specifically allow will work. Teach your child to charge the device outside the bedroom overnight, which supports better sleep and removes the temptation to use the phone after bedtime. A locked device plus a charging station outside the bedroom is a powerful combination.

Use bonus time and locking thoughtfully. Family Link lets you grant bonus minutes for good behaviour or homework completion, and lock the device immediately when needed, such as during meals or family time. Use bonus time as a reward, not a negotiation every evening, and explain lock decisions calmly. If limits cause daily arguments, the limit may be too strict, too vague, or applied inconsistently โ€” adjust it together rather than fighting over it. The goal is a rhythm your family can live with, not a perfect number.

how to set up Google Family Link parental controls in 2026 for Apps and Purchases

Getting how to set up Google Family Link parental controls in 2026 right for apps means turning on approval for new installs and purchases. In the parent app, go to Controls, then Content restrictions, then Google Play, and set “Require approval for” to all content or all paid content, depending on your child’s age. With approval on, when your child tries to install a new app or make a purchase, you receive a request on your phone, and you can approve or decline it with a note. This prevents surprise charges and unsuitable downloads.

Review already-installed apps together after setup. In the parent app, check the app list and block or set limits for apps that are not age-appropriate, even if they were installed before supervision began. Pay special attention to social media, chat, and video apps, which often have their own minimum-age rules separate from Family Link. Family Link controls the device, but each app’s own age policy and privacy settings still matter โ€” check those too, and do not approve an app simply because it is popular with classmates.

For purchases, also check payment settings. Make sure your payment method is not freely available on the child’s device, require authentication for every purchase, and turn off in-app purchase ability where possible. Review purchase history monthly in the parent app and in Google Play. If an unexpected charge appears, act quickly through Google Play support. Prevention is easier than refunds, and approval requests give you a natural moment to discuss whether an app or game is worth the money and time. If your child also uses the device for schoolwork, our guide on Google Slides tips for 2026 can help them present school projects confidently within the approved apps.

Filter Web Content, Search, and YouTube

Content filters are essential, but they are not perfect, so treat them as one layer, not a guarantee. In Family Link, go to Controls, then Content restrictions, and set Google Play filters by age, turn on SafeSearch for Google Search, and choose Chrome website controls: allow all sites, block mature sites, or allow only approved sites. For younger children, “allow only approved sites” is the safest option, though it requires you to approve school and hobby sites as needed. For older children, blocking mature sites plus SafeSearch is a reasonable balance.

For YouTube, choose the right experience for your child’s age. Younger children should use YouTube Kids, which is designed with stricter content controls. Older children may use supervised YouTube with content settings you control in Family Link, including whether they can search, what content level applies, and whether comments and live features are available. Review watch history and subscriptions together regularly, not as surveillance, but as a conversation about what they enjoy and what worries you. Teach them how to report, block, and tell an adult about upsetting content, because filters will miss things.

Teach safe-search habits alongside filters. Show your child how to recognise ads, sponsored results, and misleading headlines, and how to check whether a site is trustworthy before entering personal information. Explain never to share full name, address, school, passwords, or photos with strangers online, even if someone seems friendly. Filters protect the device; education protects the child when filters are not present, such as on a friend’s device or a school computer. Both layers matter, and neither replaces the other.

Manage Location Sharing and Device Security

Location sharing in Family Link is optional and should be decided as a family. If you enable it, you can see the child’s device location in the parent app, which is reassuring for school journeys and trips. To enable it, go to the child’s settings in the parent app, then Location, and turn on location sharing, making sure location is also on in the child’s device settings. Explain to your child why location is on, when you will check it, and that it is for safety, not constant tracking. For teenagers, agree on boundaries, such as checking only when they are late or travelling alone.

Device security settings matter just as much as content settings. Make sure the child’s device has a screen lock your child knows, automatic updates turned on, and Find My Device enabled so a lost phone can be located or locked. Review app permissions together: a torch app does not need location, and a game does not need contacts. Teach your child not to install apps from outside Google Play, not to tap suspicious links, and to ask before granting a new permission. Good security habits learned young protect them for life, and they complement Family Link rather than replacing it. For general device safety, see our guide on how to secure an Android phone in 2026 for locks, permissions, and safe settings.

Also protect the parent account itself. Use a strong, unique password for your parent Google account, turn on two-step verification, and never share your parent approval password with your child. If your child learns your parent credentials, they can approve their own apps and change limits, which defeats the purpose. Keep approval notifications on your phone, and respond promptly so your child does not feel ignored when they request a legitimate school app. Quick, fair approvals build trust in the system.

how to set up Google Family Link parental controls in 2026 for School and Multiple Devices

Many families need how to set up Google Family Link parental controls in 2026 across more than one device โ€” a phone, a tablet, and perhaps a Chromebook. Family Link supervision follows the child’s Google account, so once the account is supervised, signing into another Android device or Chromebook with that account applies your controls there too, subject to device compatibility. Link each device through the same parent app, check that screen time and app controls appear correctly on each one, and set device-specific limits if a tablet is for homework while a phone is for communication.

For school devices, check whether the school manages the device separately. School-managed Chromebooks or tablets may already have their own controls, and adding Family Link on top can cause conflicts. Ask the school IT team which system governs the device, and follow their guidance. For personal devices used for school, approve school apps promptly, allow unlimited time for homework and reading apps if that fits your family rules, and keep a separate school profile or folder if the device supports it, so schoolwork stays easy to find.

As children grow, adjust Family Link gradually. Increase daily limits, relax Play filters by age, allow more app categories without approval, and discuss removing supervision when they reach the age of digital consent and show responsible use. Family Link allows eligible teenagers to choose to stop supervision with parental notification, depending on local law โ€” treat that transition as a milestone to prepare for, not a battle. The aim is not permanent control, but a gradual handover of responsibility, with conversation and trust replacing locks over time. Official guidance on accounts, ages, and supervision is available from Google Family Link and Google Families Help.

Troubleshooting Common Family Link Problems

If the child’s device does not link, check that both devices are on Wi-Fi, signed into the correct accounts, and running updated software. Restart both devices, remove and re-add the child account if the app prompts you, and double-check the setup code or parent sign-in step. If the child’s existing account cannot be supervised without a reset, back up photos and files first โ€” our guide on transferring data to a new Android phone explains safe backup and restore steps that also help before a reset.

If approval requests do not arrive, check notifications for the Family Link parent app on your phone, make sure you are signed into the correct parent account, and check that the child’s device is online. If screen-time limits do not apply, confirm the limit is set for the correct day, that the device time zone is correct, and that the child is signed into the supervised account, not a guest profile or a second unsupervised account. Guest modes and secondary profiles can bypass supervision, so disable guest access or supervise all profiles on shared tablets.

If an app is blocked that should be allowed, approve it from the request notification or from the parent app’s app list, and check Play filters and web filters separately, because an app can be allowed while its website remains blocked. If location does not show, check location permission for Family Link, device location settings, and battery optimisation, which can stop background location updates. Most Family Link problems are account, permission, or connectivity problems, and working through those three checks in order solves the majority of cases quickly.

Frequently Asked Questions

Can my child remove Family Link themselves?

Children cannot remove supervision on their own while they are under the age of digital consent, and attempts to do so notify the parent account. Older teenagers who reach the eligible age may be able to choose to stop supervision, depending on local law, with the parent notified. If you suspect tampering, check the parent app for alerts, review installed apps and profiles, and talk to your child about why the controls matter rather than simply re-locking without discussion.

Does Family Link let me read my child’s messages?

No, Family Link does not give parents access to message content, emails, or detailed browsing history. It shows app usage, installed apps, screen time, approval requests, and location if enabled. That limit is intentional, protecting children’s privacy while giving parents practical safety controls. If you are worried about a specific conversation, talk to your child directly and agree on how to handle online contact safely.

What happens when my child turns 13 or reaches the age of consent?

At the age of digital consent, which varies by country, supervision rules change: your child may gain more control over their account, and in some regions can choose to manage it independently. Family Link will notify you about the transition and explain the options. Use the months before that birthday to gradually relax limits, discuss online responsibility, and agree on family expectations that continue even after technical supervision ends.

Can I use Family Link on an iPhone or iPad for my child?

Family Link supervision is designed for Android devices and Chromebooks for the child’s device, though parents can manage from an iPhone using the Family Link parent app. A child’s iPhone or iPad cannot be supervised by Family Link in the same way; Apple devices use Apple’s own Screen Time and Family Sharing controls instead. For mixed-device families, use Family Link for Android devices and Apple Screen Time for Apple devices, with consistent family rules across both.

Can I set different limits for weekdays and weekends?

Yes, Family Link lets you set daily limits per day of the week, so school days can be stricter and weekends more relaxed. You can also set app-specific limits and bedtimes separately. Use that flexibility to match your family’s routine: shorter limits on school nights, a little more freedom on weekends, and unlimited time for homework or reading apps whenever it makes sense.

What if my child already has an unsupervised Google account?

If your child already uses an unsupervised account and is under the age of consent, you may be able to add supervision to that account through Family Link, or you may need to create a new supervised account, depending on age and device. Creating a new account can require a device reset, so back up photos, files, and schoolwork first. Check the Family Link app’s guided flow for your child’s age and device, because the correct path varies.

Is Family Link free?

Yes, Google Family Link is free, with no subscription required. You only need Google accounts for parent and child and compatible Android devices or Chromebooks. There are no paid tiers for basic supervision, screen time, app approval, content filters, or location. Avoid third-party apps that charge for features Family Link provides free, unless you specifically need a feature Family Link does not offer.

Key Takeaways

  • Create a supervised Google account for your child and link each device through the Family Link parent app, testing locks and approvals immediately.
  • Set daily limits, app limits, and bedtime together, starting stricter for younger children and relaxing settings as trust grows.
  • Turn on app and purchase approvals, review installed apps, and require authentication for every purchase.
  • Use Play filters, SafeSearch, and Chrome controls, plus YouTube Kids or supervised YouTube, as layers โ€” not guarantees.
  • Decide location sharing as a family, secure the parent account with two-step verification, and keep approval credentials private.
  • Revisit settings every few months, prepare for the age-of-consent transition, and pair every control with conversation.

Conclusion

Setting up Google Family Link in 2026 is a practical act of care: it gives your child room to learn, play, and connect, while giving you the tools to set boundaries, block unsuitable content, prevent surprise purchases, and support healthy sleep and study habits. The setup itself takes less than an hour, but the conversation around it โ€” why limits exist, how approvals work, what to do if something worries them โ€” is what makes the system work long-term.

Start today: install the parent app, create or link your child’s account, set a sensible daily limit and bedtime, turn on app approvals, and test it together. Then review the settings monthly, relax them as your child shows responsibility, and keep talking about life online. Controls will eventually fade as your child grows, but the trust and habits you build now will last far longer than any lock.